Showing posts with label #lifestyle. Show all posts

Monday, 18 January 2016

The Infamous Nigerian Meat-Pie .....Part 2

Hi Guys!!

Welcome to the second half of our Nigerian meat-pie journey. If you haven't read the first half about how to make the meat filling, go ahead and do that now....don't worry, I'll wait :-)


Now lets get started on the second half of our meat pie.

You'll need
  • One stick of room temperature butter 
  • 300g of self-raising flour (300g of all purpose flour + 1Tbsp of baking powder)
  • 1/2 cup of cold water
  • 1 teaspoon of salt
  • 1 teaspoon of black pepper
  • 1 beaten egg  (for egg-wash)
Some other items you'll need are:
  • A rolling pin
  • A large cookie cutter (or a small plastic cup or anything you can use to cut out circles from the dough)
  • A clean and dry work surface
  • A knob of butter to grease the baking tray
  • A baking tray
  • A clean bowl
  • A pastry brush
  • A fork
  • A teaspoon
Instructions
  1. In the clean bowl, combine the flour, salt and black pepper together. Then add the softened butter.
  2. Using your fingers, rub/massage the butter into the flour/dry ingredients. Make sure that the butter doesn't remain visible, but has been worked into the flour. After doing this, it should come together when pressed in your palm, and just crumble away.
  3. Gently/ gradually add some of the cold water into the flour mixture, folding it in with a spatula (I prefer to use my hands though), as you do, until it forms a dough. 
  4. Kneed the dough on a floured work surface for about 3 minutes, until you are comfortable with it. Then allow it to rest for 5 minutes.
  5. Preheat your oven to 200 degrees celsius. Using the knob of butter, grease the baking tray and set aside.
  6. Flour the work surface, and using the rolling pin, roll-out the dough. Use the cookie cutter to cut-out some circular shapes with the dough.

  7. Now, using a teaspoon, take some of the meat filling, and place it in the centre of the cookie-cut dough. 
  8. Place your index finger in the egg wash and rub it round he rim of the cookie-cut dough. This would act as the glue.
  9. Take the second end of the dough and fold it over the meat filling. Press the fork around the edges to seal the other end in place. 
  10. Transfer the sealed meat-pie onto the greased tray and repeat the process until you've exhausted all the filling and dough.
  11. Using the pastry brush, brush the egg wash onto each meat pie  on the tray (this gives the pie its signature golden brown colour).
  12. Transfer the tray into the pre-heated oven, and allow it to bake for 12-15 minutes.
  13. Once its golden brown and done, remove from the oven and allow to cool for a while.


Tips
  • Be careful not to add too much water into the flour mixture, as this can change the consistency of your dough, and make it  quite soggy. If that happens, you'll need to add some more flour.
  • Try to roll the dough out thinly (not too thin that it begins to tear off when sealed ohh!), but just thin enough so that as you bite into it, you don't have a mouthful of pie without the meat. Theres nothing worse that chewing on a doughy meat-pie.

The Infamous Nigerian Meat-Pie...Part 1


 Hi Guyss!!

Happy New Year!!

A big welcome to 2016. I know its long over due for new recipes, but I had some very important deadlines over the holidays, and I just didn't have the time to post anything. Thankfully thats all settled now, so I'm definitely going to try my best to bring you more exciting and delicious recipes this year. Trust me, its all part of my 2016 New Year resolutions. Im going to try to get the blog posts up on time, and hopefully every sunday. I believe having a schedule would certainly make things easier.

A few days ago, a friend of mine invited me to a church programme hosted by a Nigerian family here in Sheffield. She told me it was more like a prayer session/ get together, and everyone was encouraged to bring something to share with the group. 

Funny thing is...I didn't know the family, but as a Nigerian now, we tend to follow our friends to parties and get-togethers, even when we weren't invited. Or in my case, my friends friend invited me :-).  So anyway, I wasn't sure what I wanted to bring along, but I wanted it to be something that didn't require too much time to prepare, everyone could enjoy, and could be packed up nicely to take away. 

So I knew it was definitely going to be a snack. Now, I wasn't sure what snack yet, but when I looked in my pantry, and saw the flour, carrots, potatoes and the pack of minced meat in my fridge (I was saving for my bolognese sauce), it was like a sign from the gods.

Now, you've got to remember that there are two parts to making this snack, just as the name suggests, one parts the 'Meat' and the others the 'Pie'. To prevent this post from being too long, I've decided to divide the meat-pie recipe and instructions into two parts. 

So for the meat filling, you'll need:

  • 2 Carrots (peeled and diced into cubes)
  • An onion (diced)
  • 200g-300g of minced meat
  • 3 table spoons of oil
  • 4 potato tubers (peeled and diced into cubes)
  • 1 Tbsp of salt (because potatoes absorb a lot of salt)
  • 1 Stock cube (maggi or Knorr or OXO)
  • 1 Cup of water
  • 1teaspoon of thyme, oregano, rosemary and chilli powder
  • 2tbsp vegetable oil 

  • Thickening slurry: 1 teaspoon of corn flour/ all purpose flour +1 Tbsp of water
Instructions

  1. Place the oil into the pot, and allow it to get hot (not burnt). Then add the diced onions and sauté till it becomes tender and translucent. This should take about 30 seconds if the oil was hot enough.
  2. Place the meat into the pot with the onions, and allow it to cook for about 3-4 minutes or until all the red is gone and the meat has started producing its own juices.
  3. Now add the diced carrots and potatoes, stir, and cover. Leave it for about 1 minute.
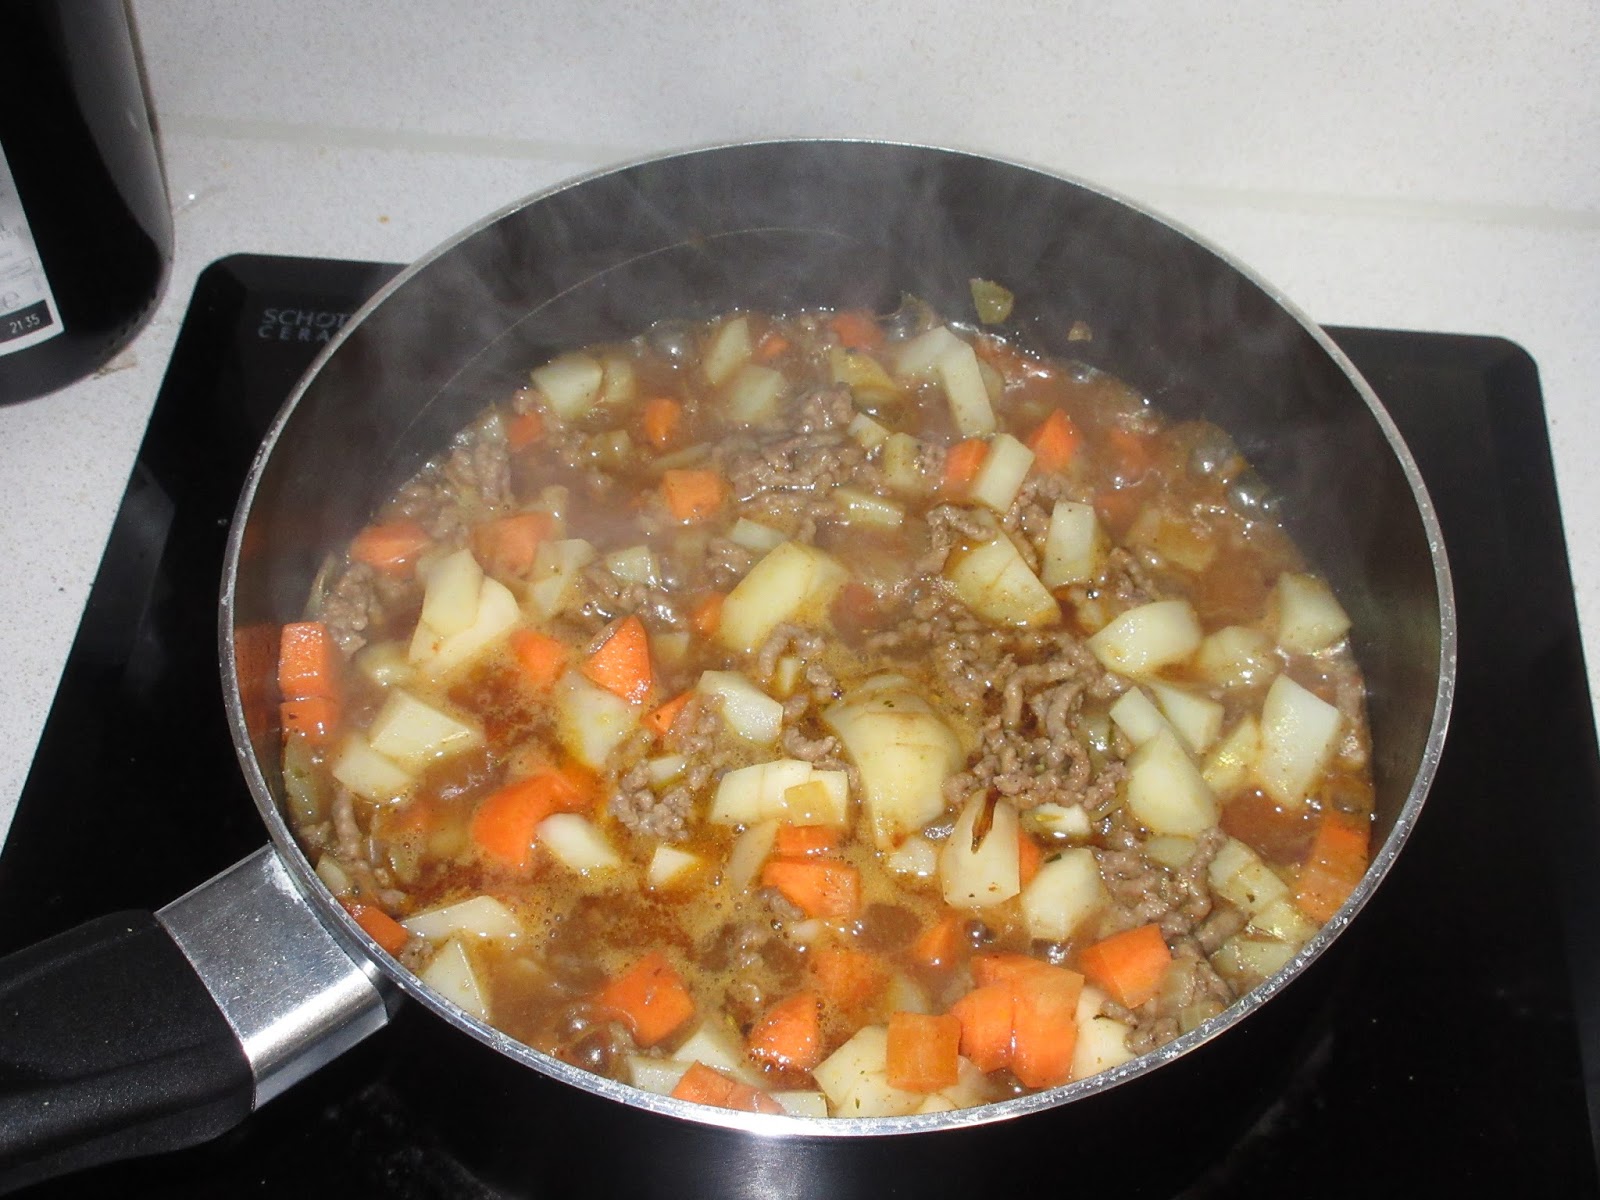
  4. Time to season! First pour in the cup of water, then add the salt, stock cubes and herbs (thyme, oregano and chilli). Allow it to cook for another 10 minutes or until the potatoes and carrot are tender (this shouldn't take too long if they were diced small enough). Always season to your preferred taste!!
  5. Now, you'll have to make a slurry of cornflour and water and add this to the pot. This would act as the thickening agent. Continue to stir the pot, to prevent it from burning, and once its thick enough, turn off the heat and allow it to cool.
    Meat filling without the thickening slurry
    Meat filling with the thickening slurry and allowed to cool
    We'll discuss the pie casing on the next post.

Monday, 21 December 2015

Still on the matter....Sushi

Hi guys!!!

So, still on the sushi matter. 

After I had downed (ate) the first batch of sushi rolls, believe it or not.... I was still hungry. 

But now, I was very inspired to try my hands on these beauties. I think they are called California rolls or something like that.  Not sure really....so please don't ask. But I guess the names of the different rolls pretty much depends on its contents. The ingredients and technique are still the same as the previous sushi roll, with the only difference being that the rice is on the outside.

If you want to learn how I made the sushi rice and other accompaniments, then do check out my previous post.  I've got everything explained in full detail.

I'm just going to start from the roll itself this time, b'cos thats where the difference is. 

Instructions

  1. Place a sheet of cling film on the bamboo rolling mat and secure tightly. However, it should be  flexible enough to wiggle as the mat does. 
  2. Place a sheet of nori on the mat, shiny side down. Slightly wet your fingers, then take the rice and spread it across the nori sheet.
  3. Heres the tricky part. Once your sheet is covered, invert (turn upside down) the sheet with the rice. Now the rice is facing the bamboo mat and the shiny part of the sheet is facing you. 
  4. Place the crispy prawns, avocado and cucumber strips across  the sheet. However, this time the contents should be placed slightly before the middle, and not exactly in the middle of the sheet.
  5. Begin to roll/fold the bamboo mat, making sure your fingers are holding the contents in place. Fold the roll securely in place by gently pressing the mat over it. Transfer onto a cutting board.
  6. Sprinkle some dark sesame seeds across the top and sides of the rice (don't worry, it would stick).  Place a sheet of cling film on the coated roll, and use the mat to gently press the seeds on the rice.
  7. Remove the mat. Using a sharp knife, with water across the blade, cut the roll in half. Then cut out as many pieces as you want. You'll most likely get 8 pieces. Place the mat over it, and gently press it into shape again.
  8. Remove the cling film, and transfer them onto your serving dish. Drizzle your sauce over the top of each slice and serve.
Tips
  • Ensure you cover the mat with the cling film, or else you'll be cleaning sticky rice out of the crevices of the mat for a while.
  • Do not press the inverted sheet onto the mat, the rice is already stuck on the nori, no need to stick it to the mat too (cling film or not).
  • Ensure the rice and nori sheet are placed well on the mat. The mat is rectangular, with a flexible side, and a not so flexible side. So to prevent having to turn the sheet or mat around (especially after you've placed your contents), check that it is placed properly.
  • Remember to clean your knife after each cut, and run some water across the blade to ensure clean cuts.
  • You can put some wasabi paste at the side of the plate if you need some.


Sunday, 20 December 2015

Its Sushi my dear Watson.....Sushi

Hi guys!!!


Okay, so from the title you can guess what I'm making for lunch today. Isn't it hilarious though....an Igbo, Nigerian girl making sushi. Yeah, I thought so too. My love for food has surpassed even my own comprehension. In the words of my favourite villain "think global, not local". 

So, can you imagine what made me venture into these uncharted waters?....Go on, take a guess. It wasn't from reading the menu in a Japanese restaurant, or watching an episode of Naruto. No, my inspiration came from a pair of chopsticks. And not the ones in a restaurant, but the ones I was using for my bun. 

Now, Ive never used chopsticks to eat before, I've only ever used them as a hair accessory, but I really wanted to learn. So I thought to myself what better way to learn, than to make my very own sushi rolls and practise with it. I don't have to pay for it outside, I'll just buy the ingredients, and most importantly, I don't have to worry about embarrassing myself in public. The only thing I have to worry about really, would be the look on the check-out girls face as she scans my 'groceries'. 

Of course to learn how to use my chopsticks and to make the sushi, I had to consult the oracle 'Youtube'.  After watching a few videos, and seeing the numerous steps, I said to myself " Self, you're in way over your head". But, I learnt a lot and couldn't wait to try my hands on it. 

So heres how I did it....


Ingredients 
For the Crispy prawns
  • 53.3g Tempura batter 
  • 75mls of cold sparkling water
  • A pinch of salt
  • 12 King prawns
  • 2 cups of frying oil
For the sushi rice seasoning
  • 5 tablespoons of rice vinegar
  • 3 tablespoons of sugar
  • 2 tablespoons of salt
For the dipping sauce
  • 2 tablespoons of Siracha sauce
  • 1 tablespoon of sweet chill sauce
  • 2 tablespoons of regular mayonnaise
Everything else
  • Half an english cucumber
  • Half an avocado
  • The juice of half a lemon
  • Wasabi paste
  • 2 cups of water
  • 1 cup of sushi rice (sticky short grain rice)
  • Black sesame seeds (optional)
  • A bamboo mat
  • 2-3 sheets of Nori (Paper-thin Roasted seaweed)
  • Cling film
  • Wooden spoon or spatula
Instructions
  1. First make the crispy prawns. Heat your oil in a deep-fryer of deep pot. Combine the tempura batter and salt with the cold sparkling water, and mix until you have a pancake batter consistency.  Coat the king prawns in the batter and place into the hot oil. Allow it to crisp up in the oil for about 2 mins, take it out and drain on a paper towel. 
  2. Next, make the dipping sauce. Combine the siracha, sweet chilli and mayonnaise and transfer to your sauce plate or container.
  3. To make the sushi rice and seasoning. Transfer the rice into a bowl and wash it till the water becomes somewhat clear. Place the rice and water in a rice cooker or pot, and allow to cook until tender. In a cup, combine the rice vinegar, salt and sugar, and set aside. Once the rice is done, remove from the heat, and drizzle in the rice vinegar seasoning. Using slicing motions (not stirring) and a wooden spoon or spatula, combine both, taste and leave to cool.
  4. Chop your other accompaniments i.e the cucumber and avocado into thin strips and set aside.
  5. Now to make the sushi rolls. Place half a sheet of nori on the bamboo rolling mat, shinny side down. Slightly wet your fingers and take about a handful of the rice and spread it over the nori. Make sure to leave about half an inch of nori space without rice for folding. 
  6. Put a small amount of wasabi paste on your index finger and spread along the middle of the rice on the nori sheet. Place your crispy prawns, cucumber and avocado in the middle along the strip of wasabi paste.
  7. Take the bamboo rolling mat with your thumbs like you're about to roll it, and use the remaining eight fingers to hold the  contents in place. Now fold/roll the mat, making sure to press gently as you roll.
  8. Once your roll is fully formed, cut it in half. Place both halves side by side and cut into quarters or sixes.
  9. Place them on your platter, and drizzle the dipping sauce across them. You can play with the sauce by making nice and creative designs on your rolls. Now its ready to eat.
So, there you have it.... my take on the classic sushi roll. It was really delicious and refreshing, definitely going to make it again. And oh yeah...of course I used my chopsticks.

Tips
  1. Don't forget to squeeze some lemon juice on your avocado after slicing them, to prevent them from turning brown.

Roast beef with potatoes

Hi Guys!!!

Hope you're all loving the festive season?...I know I am.

So, three days ago I walked past a butchers shop at the Moor market, and saw they were having a christmas sale on some selected meat products. I'm talking £4.99 for a joint and a whole chicken.
 I had already invited a friend over for sunday lunch and just told myself; a day before she comes, I'll go get something simple. So you can imagine, seeing this deal was very tempting, and after walking back and forth at the entrance, I decided to walk in. I got a 0.36kg beef joint and some sausages. I thought I'd make a juicy roast beef and probably serve it with some roasted baby potatoes and veggies. 
It sure sounds like a lot of work, but trust me... it was really easy.

 So here's what I did....

Ingredients
  • 0.36kg beef joint with basting fat
  • 1 tablespoon smoked paprika
  • 1-2 tablespoons salt
  • 1 teaspoon of thyme+rosemary
  • 1 table spoon black pepper
  • 1 tablespoon cayenne pepper
  • 5 tablespoons olive oil
  • 1 tablespoon honey
  • 8-10 baby potatoes
  • An onion bulb (ring slices)
  • 1-2 strip(s) of bacon (optional)
Instructions
  1. Bring out the beef from the fridge, remove the basting fat and allow it to get to room temperature. This should take about 30-45 minutes.
  2. Pre-heat your oven to about 200 degrees celsius. 
  3. In a bowl, combine the paprika, salt, thyme+rosemary, cayenne pepper, black pepper, 2 spoons of olive oil and honey to form a paste. Rub this around the meat and massage thoroughly.  
  4. Place the strip(s) of bacon around the meat and tie it tightly with butchers twine.
  5. Drizzle the remaining olive oil in the roasting tray and place the onion rings at the base. Wash the baby potatoes, salt them and arrange it on the tray. Place a nob of the basting fat on each potato, then transfer the beef.
  6. Place it in the oven, and allow to roast for 35mins (medium rare).
  7. Once its done, transfer the beef onto a plate, cover with some aluminium foil and allow to rest for 10 minutes. 
  8. Remove the butchers twine, slice and serve.
It was deliciously pink and juicy. 

Tips
  • Now of course it all depends on how pink you like your beef. You can increase the time if you want it well-done. 
  • Always allow your beef to rest for some time before you cut into it or else all the juices would run out, and you'll be left with a dry hunk of meat.
  • By placing a nob of the fat on the potatoes, they come out crispy and delicious. 


Saturday, 19 December 2015

Its Crispy Prawn & Jellof Rice- Made ridiculously easy

Hi Guys!!!


So I had a long day at work today, and I came home hungry and exhausted. I had branched into Tesco on my way back and just picked up some cooked king prawns. Im getting a bit tired of chicken at the moment, so decided to try something different. I really didn't want to start making anything that would keep me in the kitchen longer than 30 minutes, so I figured a nice surf and turf would be perfect. 

Now remember, I said I didn't want anything too fancy or time consuming, so my turf isn't going to be a nice juicy steak or fillet minion ooh....its simply my old best friend bacon


Now I must admit, theres a little work to be done in the preparation, but thats my fault cos I wanted my prawns crispy and not plain. 

But for the entire preparation, I didn't use more than a pot and a pan for the cooking process. Even though I knew well and good that I could have just used one pot for it all. And ohh yeah, everything was done in under 30 minutes. 

So for this you'll need;

Ingredients
  • 2 bags of 62.5g uncle ben's long grain rice (boiled)
  • King prawns (as much or little as you want)(thawed)
  • Half a teaspoon of ground black pepper
  • 1 tablespoon of salt
  • Half a teaspoon of cayenne pepper
  • I tablespoon of corn flour
  • 2 Strips of bacon
  • Half a cup of chopped/crushed tomatoes
  • Half an onion (chopped or diced)
  • Half a cup of olive oil
  • Half a teaspoon of garlic granules 
  • Half a teaspoon of curry powder
  • 2 cubes of maggi or 1 cube of OXO chicken
  • Chopped parsley (garnish)

Instructions

  1. Place your king pawns in a small bowl, and season with a pinch of salt and black pepper. Add the cornflour to the prawns and toss it to combine well.
  2. Put half of the oil in a pan/wok and allow to heat up (but not smoke). Then transfer the coated prawns. Allow the prawns to become crispy, then remove then from the oil.
  3. Transfer the bacon in to the same pan and allow to sizzle away. Once its crispy enough, remove it from the oil.
  4. Toss in your chopped onions into the same oil, and allow it become tender. It would absorb those delicious bacon fat and fond (brownish stuff) stuck to the pan. You can add more oil if you wish.
  5. Add in your crushed tomatoes and allow it to cook for about five minutes. (Maggi cubes/OXO + Half cup of Water = Good stock). Add your stock into the tomato and bring to a boil for 5 minutes. Add your curry powder and garlic granules.
  6. Transfer the bacon into the pan accompanied by the rice and mix well. Season with the remaining salt as desired.
  7. Once its hot enough and well combined, serve in a plate, top it with your crispy prawns, and of course a little parsley garnish never hurt.
Tips

Now, I know some people just can't stand the thought of mixing their rice, and would prefer to allow it cook. But remember, the rice is already cooked. Just imagine it as stir-fry. So unless you want your rice to turn to mush, stir that pot honey.

Also, theres nothing wrong in boiling your rice as soon as you start. Actually Uncle ben's only takes about 8-10 minutes to boil, which is still within my time range, especially if you're multi-tasking. 


This recipe is so deliciously easy, trust me....you'll be going in for seconds.

Easy Peezy Homemade Sweet Potato Pie

Hi Guyys!!!.... 

Today I'm bringing you my easy peezy sweet potato pie. As in people... trust me, its so easy, a five year old could do it. Plus you've already got most of the ingredients in your pantry or fridge.  

The other great thing about this recipe is that you get to do all the mixing in one bowl. So you don't have a whole bunch of bowls and dishes to wash afterwards.  

So for this you'll need; 


  • 2 eggs (room temperature)
  • 4 teaspoons of butter, melted
  • Half a cup of ground sugar (white or brown)
  • A sheet of short crust pastry (room temperature)
  • 1 teaspoon of nutmeg
  • 1 teaspoon of cinnamon
  • 1 teaspoon of ginger
  • A pinch of salt
  • 1 teaspoon of vanilla extract
  • Half a cup of evaporated milk (room temperature)
  • 2 tubers of sweet potato (peeled)

Instructions
  1. Preheat your oven to about 180 degrees celsius (350 degrees fahrenheit).
  2. Put a pot of salted water on the hob or stove, and allow it to boil. Once the water starts to bubble, place the sweet potatoes into the pot, and allow to boil till its tender.
  3. Roll out the pastry sheet and place it in the baking dish. Allow the sheet to overlap the baking dish by about an inch. Using a pastry brush, smother some of the melted butter onto the sheet and sprinkle some sugar on top of it. Using a fork, poke some holes on the bottom of the dish, to prevent it from rising. Then place the baking dish in the preheated oven for about 15 minutes.
  4. Pierce the sweet potatoes with a fork or knife to ensure its tender, before removing it and draining the water.
  5. Place the potatoes in a bowl and mash it. Using a hand mixer, whip the mashed potatoes. You would notice some thread like fibres from the potatoes stuck on the mixer attachment, clean it off and mix again. Do this until you remove most of the fibres.
  6. Now here's the fun part. Add in all the other ingredients listed above into the bowl and mix well till its all combined. The longer you mix, the nicer it tastes. This should take about 3 minutes.  
  7. Pour the mixture into the pastry dish, and place in the oven for about 30-35 minutes.
  8. This is optional, but you could sprinkle some sugar over the top of the pie and leave it in the oven for another 5 minutes.
  9. Bring it out of the oven, and allow it to cool for about 10 minutes. Here's another fun part, some like it hot, some like it cold. I personally love my sweet potato pie cold, so I leave it in the fridge for about an hour.
  10. Finally, get a slice of that pie, and you can top it with what ever you like (syrup, whipped cream, or even caramel sauce if you've got a sweet tooth).

The best part of this sweet potato pie is that its ridiculously easy to make. The ingredients are so inexpensive, and you probably already have them at home. I mean its pretty much a dump and mix recipe. 
Of course you're gonna have to wait for it to bake in the oven for a while, but trust me honey....if your minds occupied, the time would just fly-by and you'll be stuck with this delicious treat.

So give it a try.

Thursday, 17 December 2015

A welcome message to my food lovers!!!!

Hi food lovers,

Its Mz Eleanor!!!

Welcome to my blog!!!

So just a lil introduction about me.  Im really excited to start my food journey with you guys. For a while now I've been contemplating starting a food blog, but I just didn't know if I could.

Chiiilleeee.... I love cooking, trying out new recipes and just creating edible stuff. I know it can be a real drag making time for a home-cooked meal, especially if you're juggling work, the kids, the hubby and even school. But trust me...theres nothing to it.

Now I'm by no means a chef or a fancy foodie, I haven't even seen the four walls of a culinary school. Im just a laid back self thought girl, with an obsession and passion for experimenting with various food groups.

''Ladies!!!, I know it can be daunting to start cooking from scratch, but....we've got this"

Girl... Im going to introduce you to simple, easy to prepare everyday recipes, that would make your family and friends feel like you spent the whole day in the kitchen slaving for them. But hushh...its gonna be our lil secret.