Showing posts with label igbo. Show all posts

Sunday, 17 April 2016

Nigerian Puff-Puff/ Ghanaian bofrot

Hi Guys!!

Hope you had a wonderful week?...I sure did.

Ever had one of those days when all you want to eat is something fried, hot, soft and yummy, something from home that would be perfect for the horrible spring weather (cold and wet) we are having here. Well, fried yam came to mind first, but I just wasn't in the mood to go looking for yam tubers here in Sheffield.

So, I decided to try out a recipe from way back. Funny thing is, I might probably be the first or only Nigerian child that never actually had puff puff made at home. I'm not sure why, but for some reason, I don't remember my mum making it for us. I remember having it as a child though because one of my uncles bought it from a hawker on the street. 


I didn't eat it again until I went to Ghana. Its actually called 'Kose' in there, its made into very huge balls and is usually served as breakfast with some 'koko' which is pretty much very light and watery 'pap/akamu' in Nigeria.  From the kose-seller down my street, you would probably get about two huge balls of 'kose' with about a cup of 'koko' and that was a very filling breakfast... trust me!

So, I decided to re-create those fond memories of 'kose/ puff puff' without the koko/ akamu in this recipe, and make mine a bit more playful, and small for portion control. 

So heres how I made it.

Ingredients
  • 1tbsp of yeast
  • 2 cups of flour
  • 1tsp of nutmeg
  • 1/2 cup of warm water
  • 1/2 cup of warm milk
  • 1tbsp of sugar
  • 1 tsp of salt
  • 1 egg (optional)
  • 1 tsp of pepper
  • 2 litres of oil for frying
Instructions
  1. In a bowl, place the flour, salt, nutmeg, egg (optional) and pepper then mix together. It might became sticky and almost doughy if you add the egg, if not it would just be the dry ingredients.
    Flour in the bowl

    Adding the nutmeg

    Adding salt into the flour and nutmeg
  2. Add the cup of warm water into the cup of milk, add the sugar and mix. Then add the yeast and allow it to activate for about 5 minutes.
    Yeast being added to the warm milk and water

    Activating the yeast
  3. Gradually add the yeast mixture into the dough or flour mixture and mix till it becomes slightly runny and sticky. 
    Adding the yeast into the flour


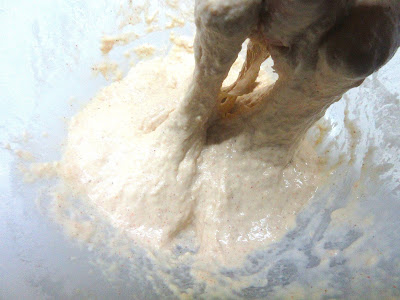
    Sticky batter
  4. Cover with a cling film or towel and place in a warm place for about 20 minutes.
    After 20 minutes, bubbles begin to form in the batter
  5. Place the frying oil in a deep pot and allow it to heat up.
    Heating up the oil
  6. Scoop the batter into the hot oil, and allow it to fry until it puffs up in the pan and the bottom begins to turn golden brown. Then flip it over and allow the other side to turn brown. (Mine had funny shapes...lol)
    Placing the batter into the hot oil

    Flipping one side over
  7. Remove from the oil, and serve immediately.


Sunday, 14 February 2016

Oyster Kilpatrick - Valentines day special

Hi Guys!!

Happy Valentines day!!

So its finally here. Love, romance, friendship, chocolates, teddies and all that good stuff. Guessing some of you don't really care much about that kinda thing huh? However, some others are really excited and looking forward to their presents. Well, which ever category you belong to, hope you enjoy the day. 

For this day, I certainly wanted to try something new, and kinda go out of my comfort zone a lil bit. I decided to try my hands on some 'oyster kilpatrick' (the irony of the name cracks me up). 
I actually haven't had oysters before, but I kinda have a fairly good idea on how to treat them, and their various accompaniments. Plus, I heard its a natural aphrodisiac, and in the spirit of Valentines day, I am certainly willing to give it a try (#wink). 


I wanted the oysters to be the star of the dish, plus I didn't want to over crowd the oyster shell, cos it would make it difficult to eat/ slurp. The bacon adds a nice chewy texture to the oyster, plus the saltiness is an added advantage.

So heres what I made.
Ingredients
  • 3 strips of bacon (chopped)
  • 2 tbsp of Worcestershire sauce
  • 1 tbsp of lemon juice
  • 3 -4 drops of siracha (chilli sauce)
  • 1 tbsp of ketchup
  • 1 tbsp of salt (add to water)
  • 1 tsp crushed black pepper
  • 3 oysters
  • Lemon wedges (for garnish)
Instructions
  1. Preheat your oven to 180 degree celsius, and line a baking tray with parchment paper.
  2. In a bowl, mix the worcestershire sauce, lemon juice, siracha and ketchup and set aside.
    Sauce mixture
  3. Wash the oyster under running water, and then place them in a pot of salted water.
    Three oysters
    The oyster in the pot of boiling water
  4. Add the black pepper and allow the water to come to a boil.
  5. Once the water starts to boil, remove the pot from the heat and pour away the water, then allow it to cool.
    Removed the water and allowing it to cool
  6. Using a knife, pop open the oyster shell, and slide the knife across the sides of the shell to detach it properly. 
    Opening the oyster

    Success..its opened!!
  7. Once the shell is opened, place the oysters on the baking tray.
    Opened oysters on baking tray
  8. Add the worcestershire sauce mixture, and top with the bacon, then place this in the oven for 5-7 minutes.
    Bacon strips cut into cubes
    Sauce mixture added to the oysters
  9. Remove them from the oven, when the bacon done. Place the oysters on some rock salt, to stabilise them, and Enjoy.
Tips
  1. You can pre-cook the bacon ahead of time, and just place on the oysters.


Saturday, 13 February 2016

Poached Pears (Valentines day special)

Hi Guys!!

So, tomorrow is Valentines day. Its certainly a day I really enjoy, if not for anything, just for the fact that at least one day in the year, people care about companionship. Of course every one has their own interpretation of the day, and what it means to them. So those of us that are 'bae-less' or 'boo-less' this year, we are definitely going to turn-up in our own way. 
Its quite interesting it falls on a sunday this year though. I certainly can't wait to see how it would be incorporated into the sermon. Yesterday, I saw a picture on instagram; and the guy was like...."I'm sorry valentines day is on a sunday baby, I'm staying back for first, second and third service, and after that, youth fellowship too". I just couldn't stop laughing. Anyhoo, I've put together my favourite valentines day recipes in a series of posts I call 'Valentines day specials', so check it out. 


The first recipe I thought about was this beautiful  poached pear in red wine glaze. Its so beautiful, succulent and sweet...its certainly a beautiful dessert to share with that special someone.
Its really easy and only requires a few ingredients. But like everything, presentation is key.


So heres how I made it

Ingredients
For the poaching liquid

  • 1 tbsp cinnamon
  • 1 lemon (juice and zest)
  • 3-4 star anise (optional)
  • 1 tbsp nutmeg
  • 1 tsp of salt
  • 1tsp vanilla extract
  • 1/2 cup granulated sugar + 1/2 cup brown sugar
  • 2-3 cups red wine (the cheap stuff is fine)
Others
  • 3 Pears
Instructions
  1. Put all the ingredients for the poaching liquid in a pot and place the pot on the heat source. Bring to a simmer.
    Lemon zest placed in a bowl

    Lemon juice

    Adding the sugar to the lemon zest and juice

    the lemon, star anise and sugar

    Adding the red wine to the pot

    Poaching liquid allowed to simmer
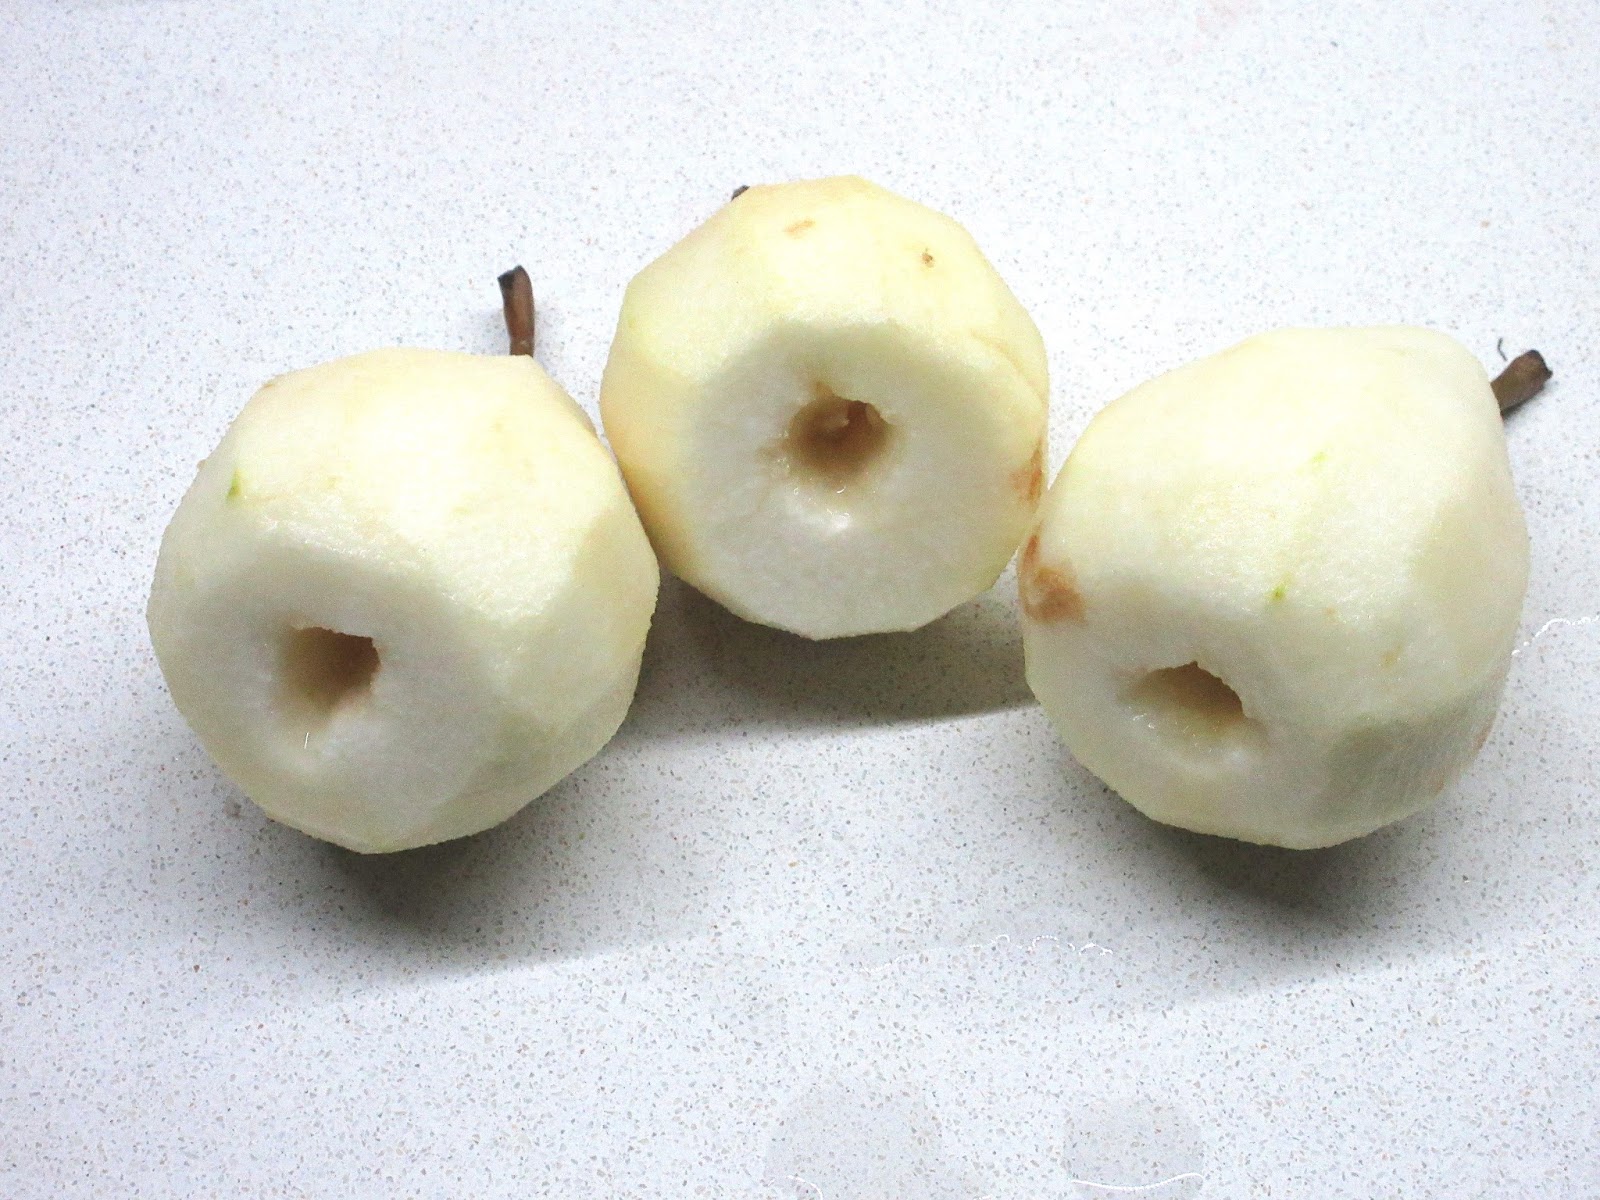
  2. Peal the pears and core it from the bottom by removing some of the seeds. Cut a part of the bottom to allow it balance well on the surface.
    Pears

    Cored pears and bottom cut to flatten and stabilise it
  3. Place the pears in the poaching liquid, and allow to boil for about 30 minutes.
    Pears in the poaching liquid


    The pears are poaching

  4. Remove the pears and star anise from the pan and allow the poaching liquid to reduce into a sauce. It should coat the back of a spoon.
    Pears and star anise removed from the pot
  5. Once the sauce has reduced, plate the pears. You can do this how ever you like.
  6. I melted some chocolate and brushed it across the plate, then placed the whole pear in the middle and drizzled the glaze onto it. I cut the second pear in half and made thin slices with one half, then fanned it out. A scoop of ice-cream and some chocolate chips can be placed on the plate.


Monday, 18 January 2016

The Infamous Nigerian Meat-Pie .....Part 2

Hi Guys!!

Welcome to the second half of our Nigerian meat-pie journey. If you haven't read the first half about how to make the meat filling, go ahead and do that now....don't worry, I'll wait :-)


Now lets get started on the second half of our meat pie.

You'll need
  • One stick of room temperature butter 
  • 300g of self-raising flour (300g of all purpose flour + 1Tbsp of baking powder)
  • 1/2 cup of cold water
  • 1 teaspoon of salt
  • 1 teaspoon of black pepper
  • 1 beaten egg  (for egg-wash)
Some other items you'll need are:
  • A rolling pin
  • A large cookie cutter (or a small plastic cup or anything you can use to cut out circles from the dough)
  • A clean and dry work surface
  • A knob of butter to grease the baking tray
  • A baking tray
  • A clean bowl
  • A pastry brush
  • A fork
  • A teaspoon
Instructions
  1. In the clean bowl, combine the flour, salt and black pepper together. Then add the softened butter.
  2. Using your fingers, rub/massage the butter into the flour/dry ingredients. Make sure that the butter doesn't remain visible, but has been worked into the flour. After doing this, it should come together when pressed in your palm, and just crumble away.
  3. Gently/ gradually add some of the cold water into the flour mixture, folding it in with a spatula (I prefer to use my hands though), as you do, until it forms a dough. 
  4. Kneed the dough on a floured work surface for about 3 minutes, until you are comfortable with it. Then allow it to rest for 5 minutes.
  5. Preheat your oven to 200 degrees celsius. Using the knob of butter, grease the baking tray and set aside.
  6. Flour the work surface, and using the rolling pin, roll-out the dough. Use the cookie cutter to cut-out some circular shapes with the dough.

  7. Now, using a teaspoon, take some of the meat filling, and place it in the centre of the cookie-cut dough. 
  8. Place your index finger in the egg wash and rub it round he rim of the cookie-cut dough. This would act as the glue.
  9. Take the second end of the dough and fold it over the meat filling. Press the fork around the edges to seal the other end in place. 
  10. Transfer the sealed meat-pie onto the greased tray and repeat the process until you've exhausted all the filling and dough.
  11. Using the pastry brush, brush the egg wash onto each meat pie  on the tray (this gives the pie its signature golden brown colour).
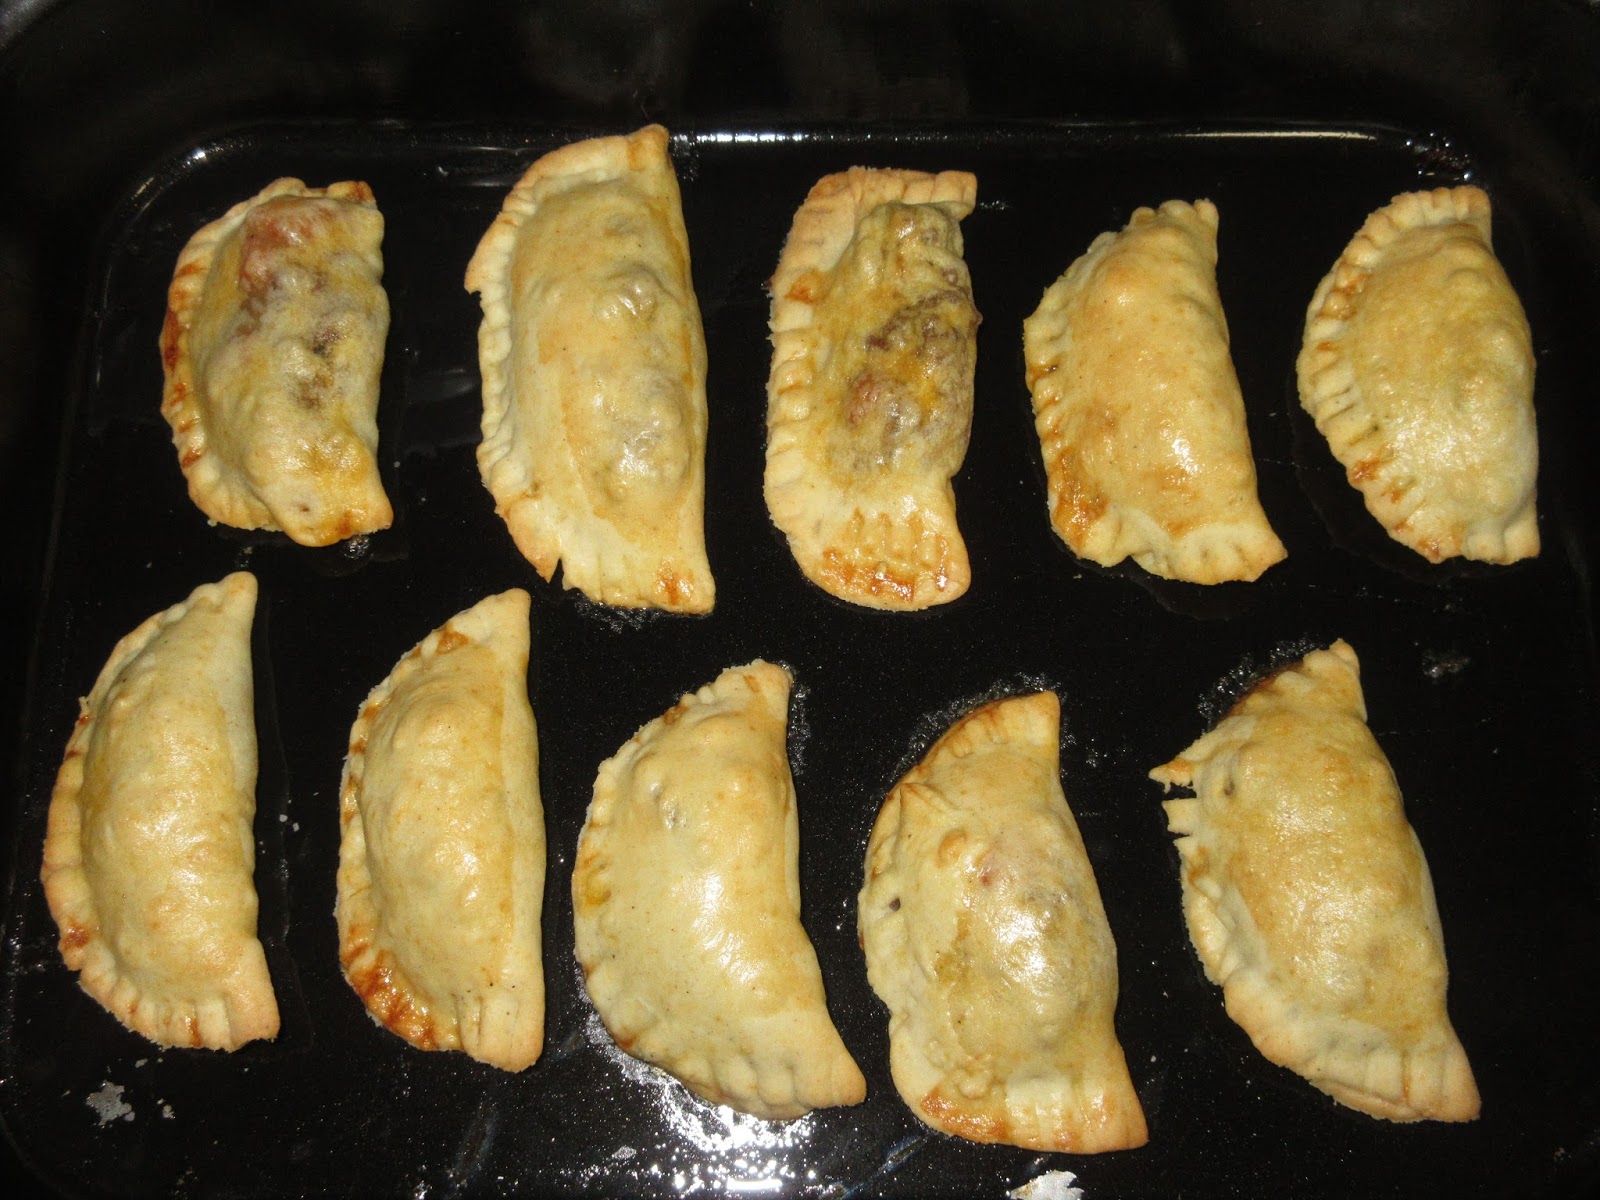
  12. Transfer the tray into the pre-heated oven, and allow it to bake for 12-15 minutes.
  13. Once its golden brown and done, remove from the oven and allow to cool for a while.


Tips
  • Be careful not to add too much water into the flour mixture, as this can change the consistency of your dough, and make it  quite soggy. If that happens, you'll need to add some more flour.
  • Try to roll the dough out thinly (not too thin that it begins to tear off when sealed ohh!), but just thin enough so that as you bite into it, you don't have a mouthful of pie without the meat. Theres nothing worse that chewing on a doughy meat-pie.