Hi Guys!!!
Hope you had a great week?...I know I did.
Today, we would be making a batch of my chewy nerdy chocolate chip cookies. Yes guys, you read that right...Nerdy! It's such a simple recipe, but it's definitely guaranteed to blow your mind.
I'm talking about the beautifully crunchy brown exterior, and the gooey-chewy interior with those delicious milk chocolate-chips, c'mon need I say more? And of course, you can play around and decorate it anyhow you want. From children's birthday parties to science conventions, you are the Judge Judy of your cookie.


Ingredients
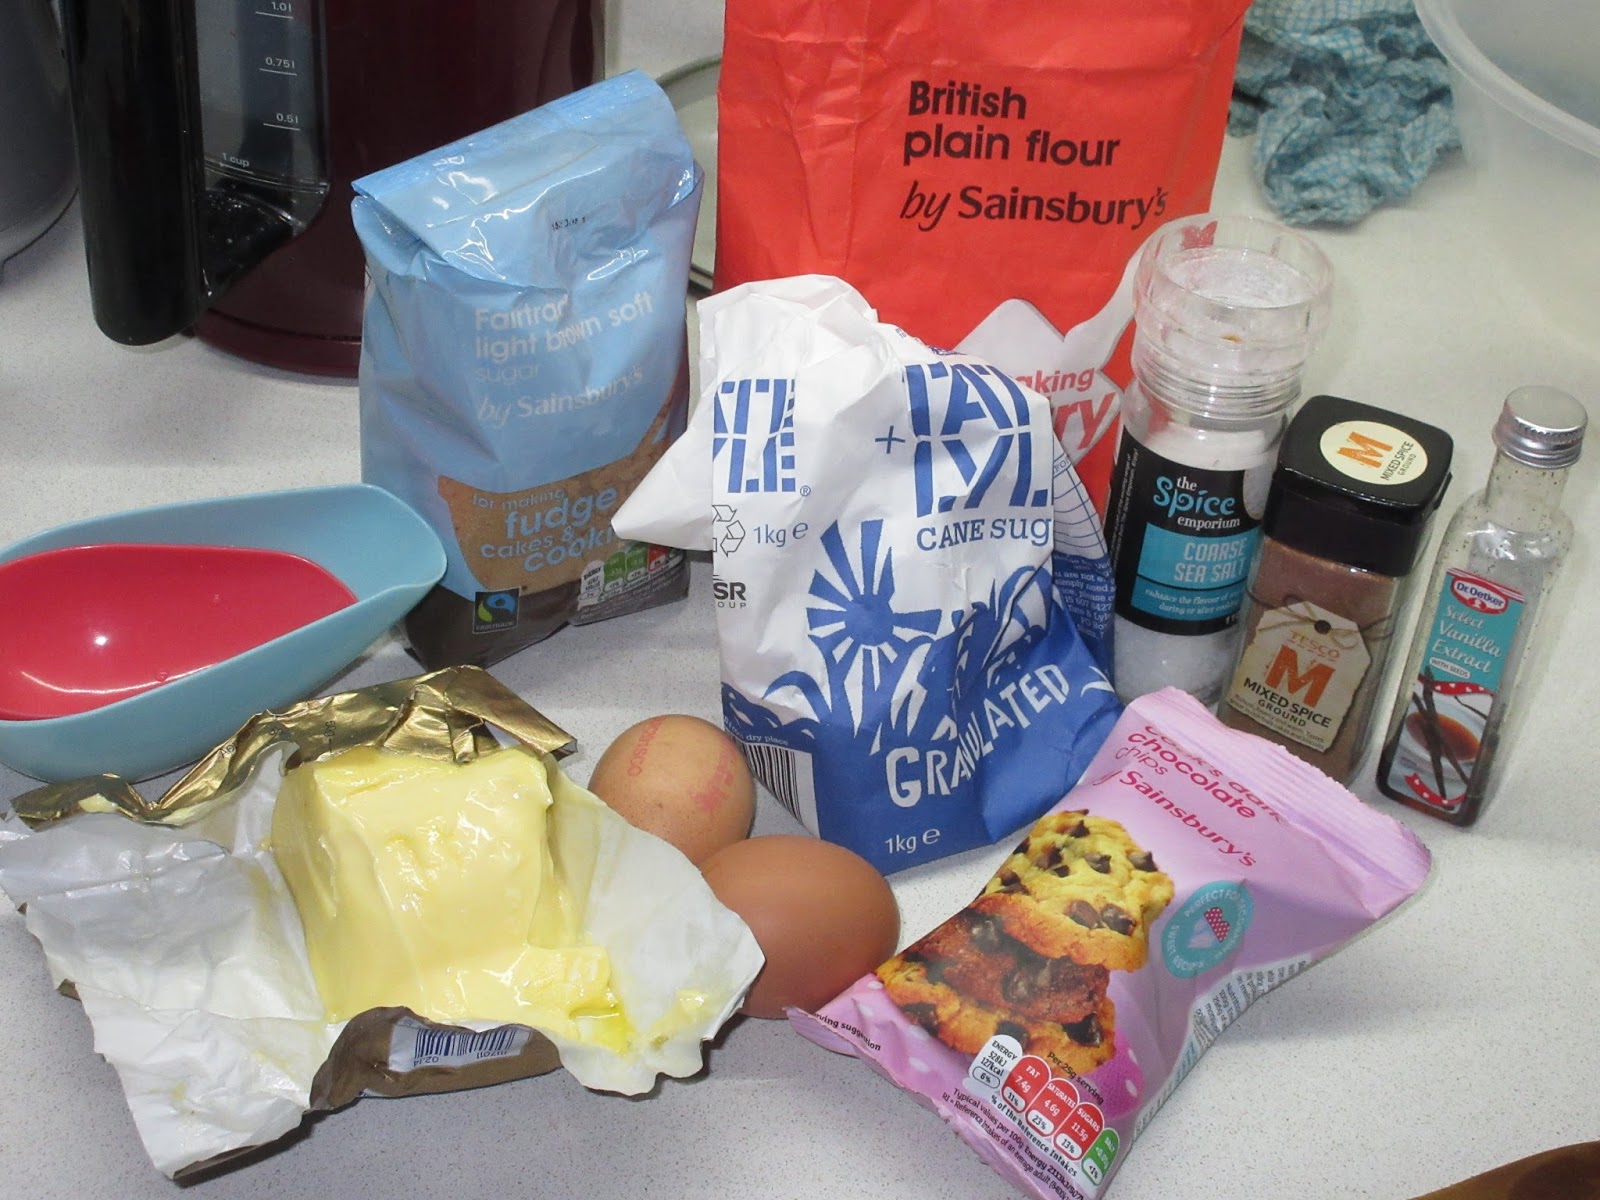
- 1.5-2 cups of all purpose flour
- 3/4 cup of room temperature butter
- 1tsp of bicarbonate soda
- 1 whole egg & 1 yolk
- 1 cup of packed ground brown sugar
- 1/2 cup of white ground sugar
- 1 Tbsp of Vanilla extract
- 1 tsp of salt
- 1/2 tsp of cinnamon+nutmeg+ginger (optional)
- 1 cup of chocolate chips (or just chop any chocolate bar of your choice into small chips)
- 2 clean bowls
- A baking tray
- A piping bag (or just a regular transparent bag)
- An electric mixer (a plastic spatula or wooden spoon is also fine)
- Parchment paper/ baking sheet for lining the baking tray (a knob of butter can also be used to grease the tray)
- A pair of scissors
- An ice cream scoop or teaspoon
- Pre-heat the oven to 200 degrees celcius and line the baking tray with parchment paper, or grease it with the knob of butter.
- Put the softened butter, brown and white sugar into the bowl.

- Mix them all together; creaming the butter and sugar can be done with the spatula, spoon or electric mixer.
- In a separate bowl, sieve the flour, salt and bicarbonate, and set it aside, this makes up the dry ingredients.

Flour, salt and bicarbonate - Add the whole egg, mix, then add the yolk into the creamed butter and sugar and mix that well. Add in the vanilla extract and other spices (optional) and mix it in well too. This makes up the wet ingredients.

The yolk added to the creamed butter and sugar - Now gradually add the dry ingredients into the wet, and mix. It should form a some-what sticky dough (that just comes away from the bowl when mixed). Then add half the chocolate chips and incorporate it into the dough.

Adding the chocolate chips into the cookie dough - Time to make our individual cookies. Using the teaspoon, take a scoop of your cookie dough and roll it into a ball in-between your palms. Place it onto the baking sheet or on the greased baking tray.
- Ensure you leave some space after each ball, as the cookie would certainly spread out. Do this for the remaining dough, until its all finished.
- Now, gently press each rolled ball down on the sheet, so it looses its ball-like shape and looks a bit squished.

- Place this into the pre-heated oven, and allow to bake for about 10minutes or until the edges turn brown (the middle would be chewy).
- When the cookies are done, remove them from the oven and place them on the work surface and allow it to cool.

The cookies are fresh out of the oven - Melt the remaining half of the chocolate chips in the microwave and scoop it into the side of a plastic bag. Using the scissors, snip the end of the bag, and draw what ever you like on your cookie.

- Allow the chocolate to harden, and then you can enjoy your cookies with a glass of milk.


 |
| Creamed butter and sugar |


- Ensure that when you add the egg and yolk, you mix it well at one spot before incorporating the whole. This would prevent the butter, sugar and egg from splitting and looking funny.
- Depending on how you want your cookie, you can either leave it for 10minutes to be chewy or 13 minutes to be more crispy.
- Ensure your cookies have cooled down a bit before you begin drawing the chocolate over it. This would prevent the chocolate from melting away because of the hot cookie.
- While melting the chocolate in the microwave, do it at intervals of 5-10 seconds, bring it out and stir. This would prevent your chocolate from burning. It is also a way to temper the chocolate, to ensure it remains solid at room temperature.
I would like to give a big shout out to '+Tomiwa Adekunle' for trying out the Nigerian Meat-Pie recipe. She said it turned out great and delicious.
Do share your recipes and pictures with me when you make them, I would certainly love to see how yours turned out.
You can also either leave me a comment on the blog or just #mzeleanorskitchen on Facebook and Instagram, and I'll definitely check it out.
No comments:
Post a Comment